Large Format Photography: Everything You Need to Know
If you’re privy to the world of film you are probably familiar with 35mm and 120. These are the most common formats because of their wide range of aesthetic and technical possibilities. Large format photography is often considered an outdated mode of shooting, only prevalent due to the lack of options available at its height of popularity. Large format is unique in its high image resolution, exceptional depth of field control and a particular approach to composing images that can significantly influence your photography style. However, it can also be complex and requires more preparation and knowledge than using smaller format cameras. Here's a comprehensive guide to get you started:
Format Sizes
Large format sizes typically start at 4x5 inches, but also include 5x7 inches, 8x10 inches, and even larger. Some photographers use ultra-large formats of 11x14 inches, 16x20 inches, or more. The larger the format, the more detail it can capture, as there's simply more physical area to record information on. This results in images with higher resolution and finer grain. Additionally, larger formats have a different "look" in terms of depth of field and perspective. The benefit of using a more miniature camera, like a 4x, is its portability and ability to capture scenes without a long arduous setup process. These cameras would be ideal for things like street, portraiture, and editorial where you typically see larger formats reserved for landscape.
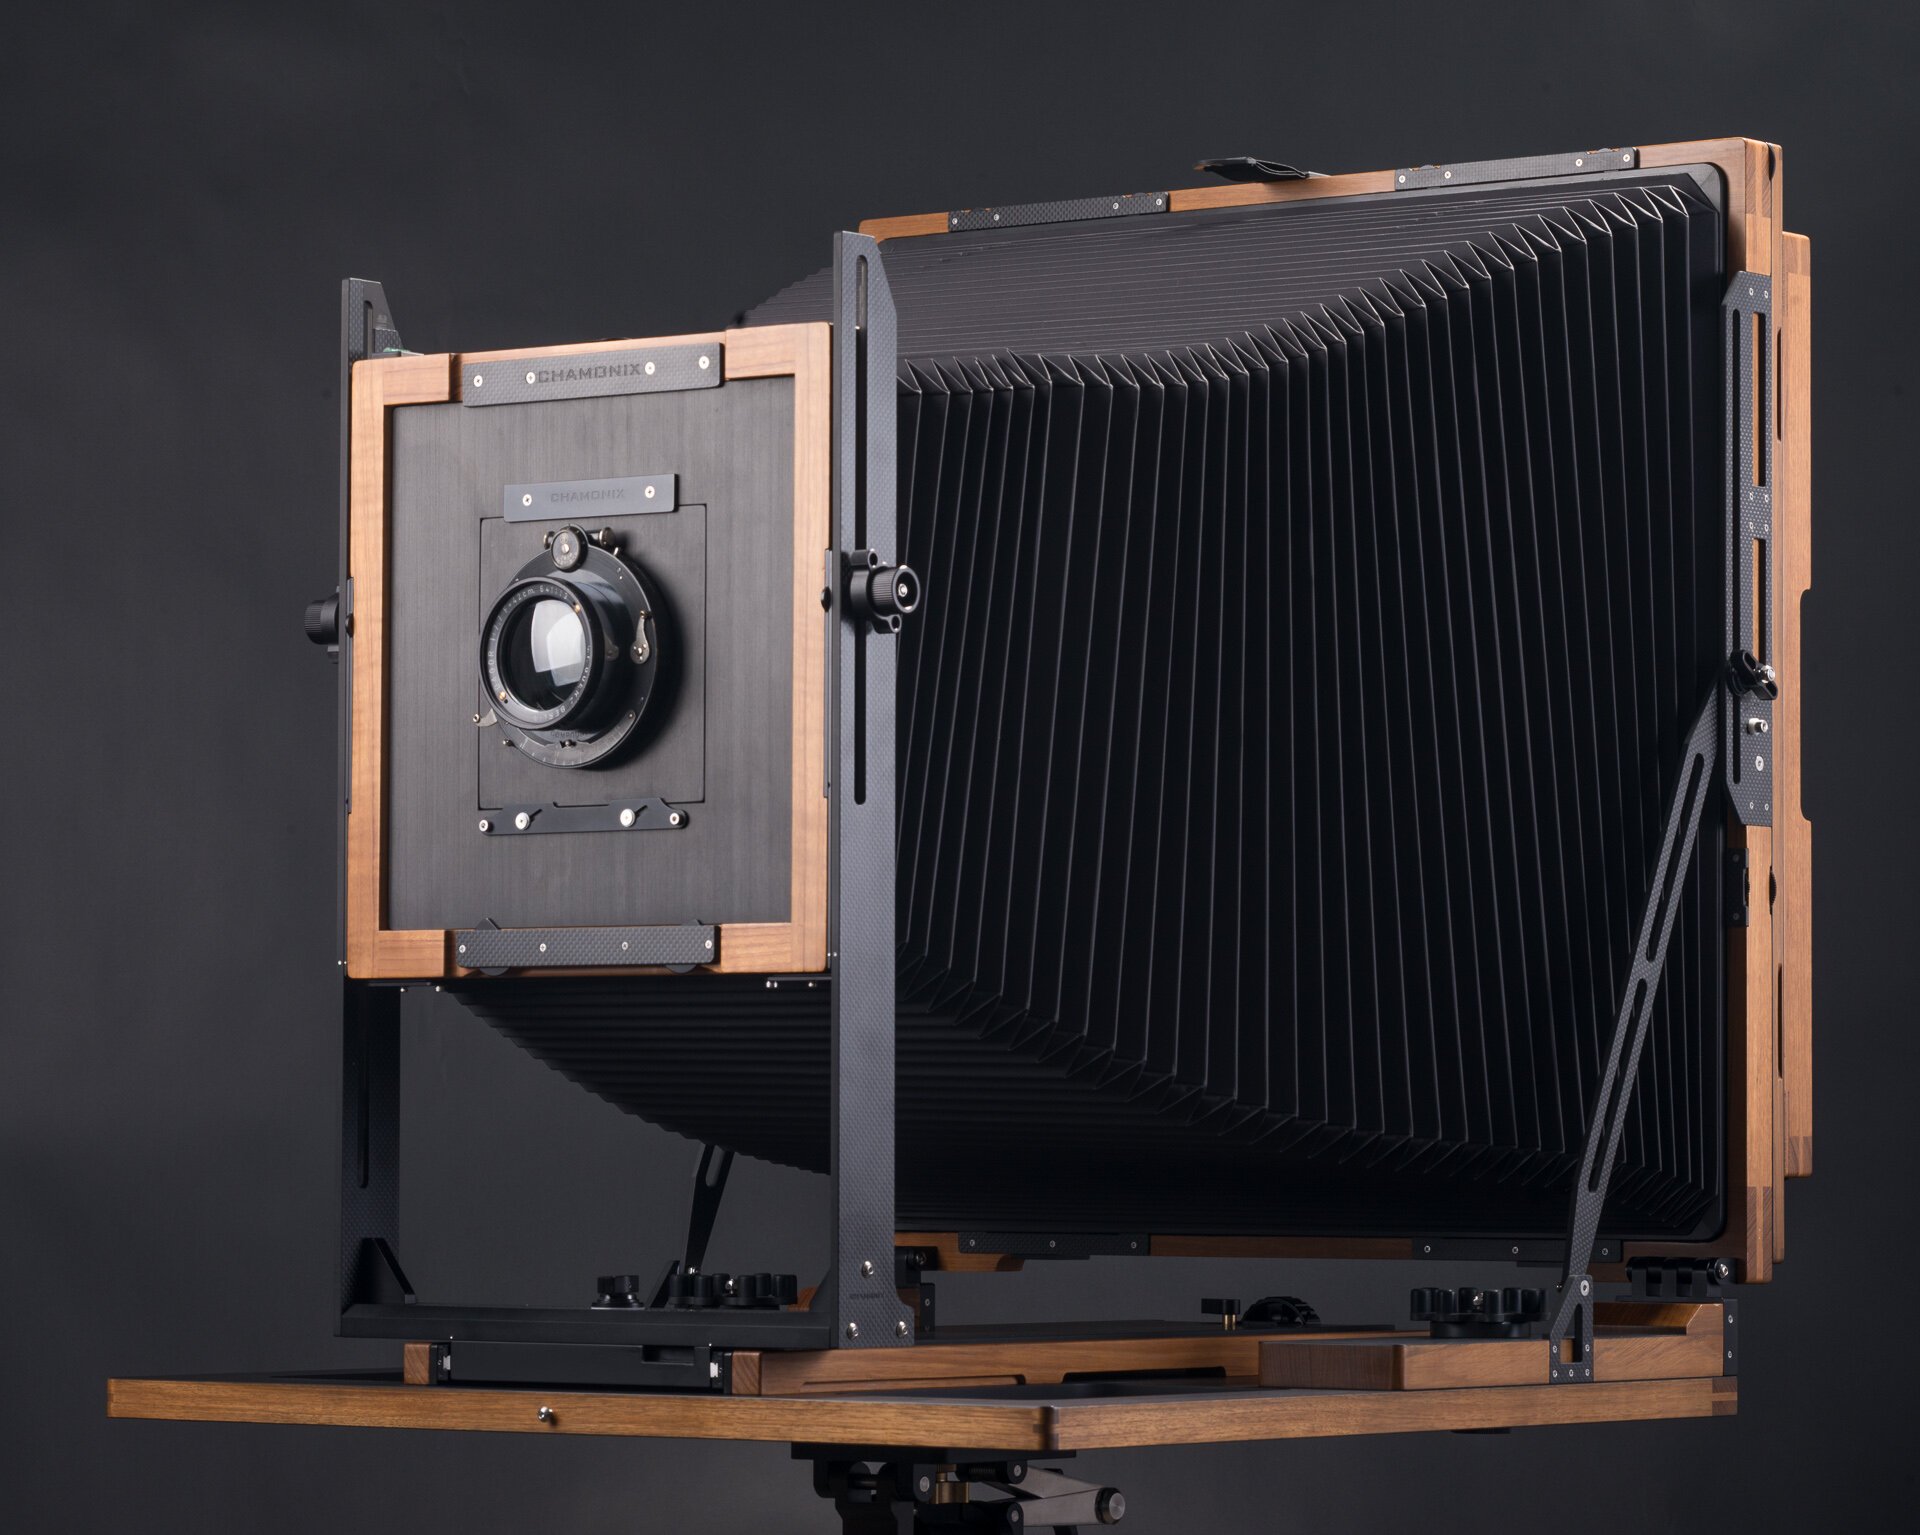


Makeup of a 4x5 Camera via Alex Burke
Monorail vs. Field Cameras
Monorail Cameras: These are the most common type of large format camera and are generally designed for studio use. They have a rail (monorail) that the front and rear standards move along, providing precise control over movements, which allows you to adjust focus and perspective. They are highly adjustable and very stable but tend to be heavier and less portable than field cameras. Monorail cameras often provide more extensive and precise movements (rise, fall, shift, tilt, and swing) than field cameras. This flexibility allows for more precise control over focus and perspective, making them a favorite for architectural and product photographers.
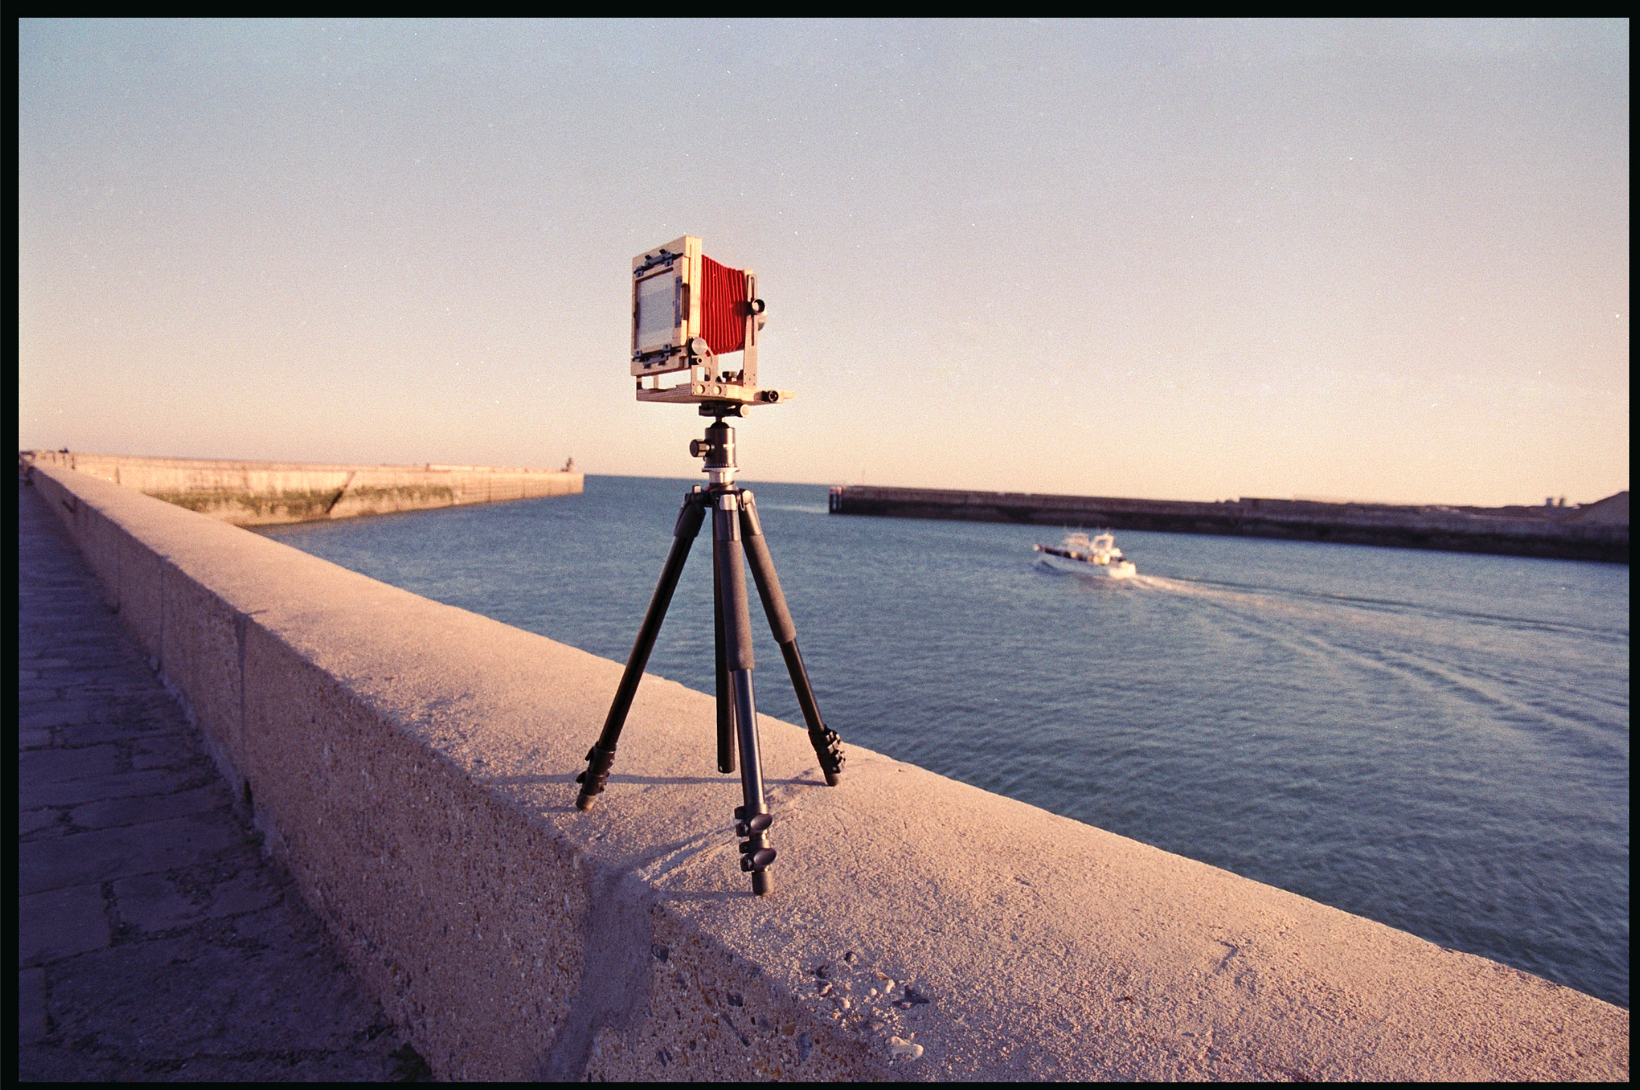
Field Cameras: These cameras are designed to be more portable, often folding into a compact box. They usually offer fewer movements than monorail cameras and are less precise but are more practical for on-location work. They are typically made of wood or metal and use a design that allows them to be folded and carried easily. if you intend to do landscape or outdoor photography where you'll be moving around a lot, a field camera's portability and simplicity would be advantageous. Field cameras are also generally less expensive, which might make them a better choice for those new to large format photography.
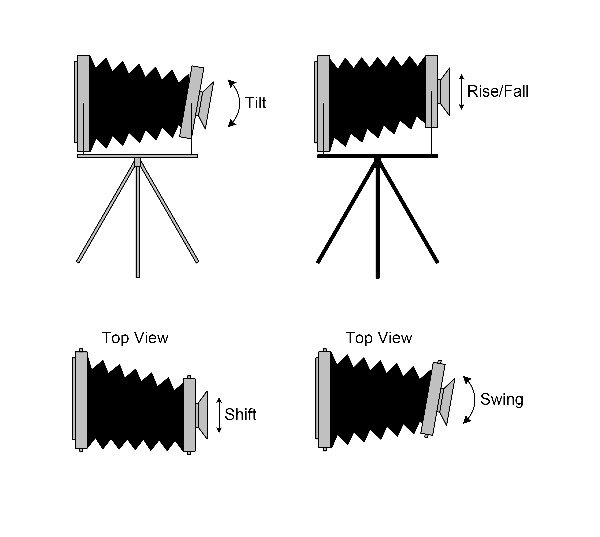
Understanding Movement
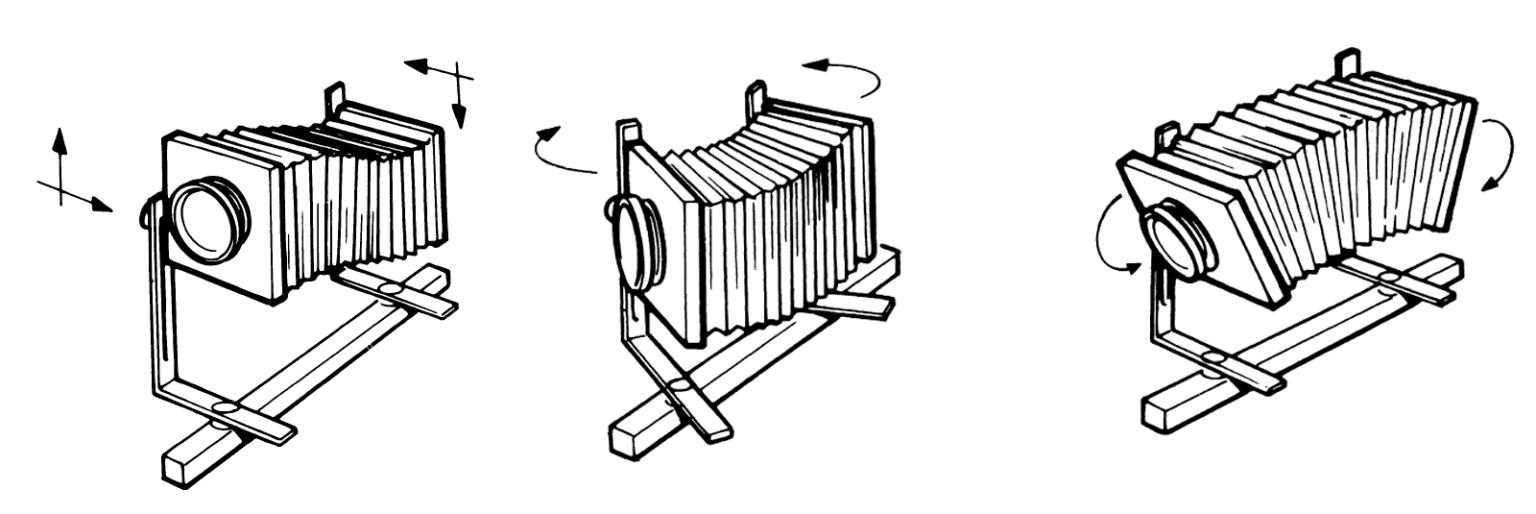
As mentioned in regards to the Monorail, there are a variety of movements that you need to understand when picking up a large format camera. Movements refer to the ability to adjust the lens (front standard) and film plane (rear standard) in relation to each other. They give you a high degree of control over focus, perspective, and distortion. Here are the movements you should know:
Tilt: This is the ability to angle the front or rear standard forward or backward. The tilt movement changes the plane of focus, allowing it to be aligned with the subject for better focus across the image. This is particularly useful in landscape and product photography where you want both near and far objects (or top and bottom of an object) to be in sharp focus. Tilting the lens forward or backward can also adjust the image's perspective, changing how the subject's size and shape appear in the image.
Shift: Shift refers to moving the front or rear standard left or right while keeping it parallel to the film plane. This movement is mainly used to correct or adjust the perspective, especially in architectural photography. For example, if you're photographing a tall building from ground level, shifting the lens upward can help reduce the "falling over backwards" perspective distortion that often occurs.
Swing: Swing is similar to tilt but operates on the left-to-right axis rather than front-to-back. By swinging the front or rear standard to one side or the other, you can adjust the plane of focus to align with angled subjects. It's helpful when you're trying to keep an entire subject that extends diagonally (like a row of objects receding into the distance) in sharp focus.
Rise/Fall: This is the movement of the front or rear standard up or down. Rise and fall movements don't change the plane of focus or perspective but rather shift the framing of the image up or down without having to move the camera itself. This is particularly useful when you want to change the composition or avoid objects in the foreground or background without introducing perspective distortion. For example, you might use a rise movement to photograph a building while avoiding a parked car in the foreground, without having to tilt the camera upwards (which would cause the building to look like it's leaning backwards).
Equipment
Large format photography is a masterclass in precision, patience, and specificity. One of the reasons this is true is that you need a ton of equipment to get your large format practice off the ground. Here’s a list of gear to get you started:
Tripod: A sturdy, well-built tripod is crucial in large format photography due to the size and weight of the camera, and so that you can minimize camera shake during long exposures. Don’t go cheap on a tripod, buy something you know can support the weight of your camera and is portable enough to lug around with you. Shop here
Dark Cloth: Used to cover your head and the rear of the camera, so you can clearly see the ground glass when composing and focusing. Shop here
Loupe: This magnifying tool is used to closely examine the ground glass for precise focusing. This is an essential tool even with the dark cloth. Shop here
Light Meter: Large format cameras do not have built-in light meters, so you'll need a separate hand held meter to measure light for correct exposure. Buy my light meter of choice here
Cable Release: This is a mechanical device used to activate the camera's shutter without touching the camera, reducing the risk of camera shake. Often exposure on large format cameras can be very long so this tool is essential. Shop here
Film Changing Bag: If you’re shooting large format, you'll need a completely dark space to load and unload film. Shop here
Notepad and Pen: This is great for note-taking in the field, so you can record details about each shot (e.g., lens, aperture, shutter speed, and any movements used). This information is invaluable for learning and troubleshooting any issues that might arise. Normally if you are shooting 35mm or 120, I’d say this is a suggestion but I’d highly recommend it with a large format setup. Due to the effort, time, and limited quantity of sheet film available you want to make sure you’re nailing every shot and correcting anything you may have done wrong. Detailed notes help you identify your problem when you see your final exposures.
Graduated Neutral Density Filters: These help balance the exposure in a scene. Great for shots where you have a really bright sky and a much darker landscape. Shop here
Polarizing Filters: If you’re shooting in nature this filter is essential for darkening skies, and suppressing glare and other reflections from bodies of water. Shop here
Camera Bag: With all this gear you’re gonna need a bag. A bag with removable dividers is best to stay organized and have ease of access while you shoot. Check out Peak Design’s camera bag here and the Shimoda Action X Series here
Developing and Scanning: Developing and scanning sheet film is often considered a special service for labs, one that not all labs provide. Once developed sheet film has to be scanned on a drum scanner or flatbed. Make sure your lab offers these services before getting stuck with film you can’t process. If you are shooting black and white sheet film, it is worth considering developing and scanning yourself. Check out a video on developing sheet film with a home setup here

©prashantkhapane.com
Getting Started
Trying to source a 4x5 camera can be intimidating and a bit more difficult to discern quality from junk when you’re sourcing from eBay or antique stores. When buying a body I recommend starting with the Intrepid Camera series. Intrepid has been focused on modernizing the large format experiences by creating new robust cameras. Their bodies are hands down the lightest and cheapest options on the market while still being able to buy something that is completley new.
“All Intrepid 4x5 cameras will work with any standard 90mm-300mm large format lens. You can also use 75mm lenses if mounted on a recessed lens board.
In terms of focal length, we would recommend getting 150mm for your first lens. This is considered the standard and is the closest to what the human eye sees. It is also equivalent to 50mm on a full frame or 35mm camera.)” (via Intrepid’s website).
Happy shooting!